


Rendering your own beef tallow transforms humble animal fat into something remarkable—a pure, white, shelf-stable ingredient that serves you in the kitchen and on your skin. Whether you’ve got a batch of grass fed beef fat waiting in your freezer or you’re curious about this traditional skill, this guide walks you through every step of the rendering process, from selecting quality beef suet to pouring finished tallow into mason jars.
This guide is for home cooks, traditional food enthusiasts, and anyone interested in natural, sustainable fats. Learning to render tallow empowers you to create a versatile, nutrient-rich ingredient for cooking, skincare, and household uses.
You’ll learn both wet rendering and dry rendering methods, understand when each serves you best, and gain the confidence to render beef tallow like generations before you.
What is Tallow Rendering?
Tallow rendering is the simple yet transformative process of applying gentle heat to raw beef fat, melting it away from connective tissues, meat residues, and impurities until you’re left with pure fat that’s stable, versatile, and deeply nourishing.
Tallow is rendered beef or lamb fat that is cooked down to remove impurities (Fact #1, #2, #5). The term "tallow" can also refer to rendered fat from other ruminant animals, like sheep (Fact #4). In contrast, lard is rendered pork fat (Fact #3).
The term “tallow” specifically refers to rendered fat from ruminant animals—primarily beef and lamb fat—distinguishing it from lard, which is rendered pork fat. While both are valuable cooking fats, beef tallow solidifies into a harder, white solid at room temperature with a melting point around 104-122°F, making it ideal for applications where stability matters.
This isn’t a modern invention. For centuries, tallow served as the backbone of household self-sufficiency. Our grandmothers rendered beef fat for frying, soap-making, and candle production long before industrial vegetable oils took over kitchen shelves. Today, we’re rediscovering what they knew: that properly rendered tallow offers something commercial products simply cannot replicate.
Modern applications extend far beyond the skillet. Grass fed beef tallow has become a cornerstone of natural skincare, prized for its compatibility with human skin and its rich content of fat soluble vitamins. Artisan soap makers, skincare formulators, and gourmet cooks alike are returning to this traditional rendered fat.
Benefits of Rendering Your Own Tallow
When you render tallow at home, you control every aspect of the process. That control translates into a superior product—and real savings.
Quality grass fed tallow from specialty retailers commands premium prices, often $15-25 per pound. Yet a local butcher shop frequently offers beef suet for a few dollars per pound, sometimes free if you build a relationship with them. Your investment becomes your time and attention, not your wallet.
Beyond cost, rendering animal fat at home preserves what commercial processing often destroys. Gentle low heat rendering maintains the delicate fatty acids, conjugated linoleic acid (CLA), and vitamins A D E that make grass fed beef tallow so valuable for cooking and skincare. Industrial high-temperature processing can degrade these nutrients.
You also eliminate additives entirely. Commercial rendered beef fat sometimes contains preservatives, deodorizers, or blended fats. Your own tallow contains exactly one ingredient: pure beef tallow.
There’s something deeply satisfying about mastering this traditional skill. It connects you to ancestral wisdom, reduces waste, and gives you a versatile product that serves dozens of purposes throughout your home, from homemade creations to exploring a range of traditional tallow-based remedies and products.
Wet vs. Dry Rendering Methods
The method you choose shapes your finished tallow’s character, color, and scent.
Dry rendering applies direct heat to beef fat without added water. You’ll load your slow cooker or crock pot with prepared fat, set the temperature low, and let time do its work. This method produces excellent cooking-grade tallow with a subtle beefy smell—some find this appealing for frying, while others prefer a more neutral product.
Wet rendering uses water and salt to facilitate purification. The water creates a barrier between the fat and direct heat, helping impurities dissolve and separate. This wet method produces remarkably pure white tallow that’s virtually odorless—the preferred choice for tallow for skincare, soap making, and applications where you want no beef smell whatsoever.
Time requirements differ significantly. Dry rendering a batch typically runs 4-8 hours depending on quantity. Wet rendering extends that timeline, often requiring multiple purification cycles over 1-2 days to achieve pristine results.
Equipment needs overlap considerably—both methods work beautifully in a slow cooker—but wet rendering demands more attention to separation and straining.
Choose dry rendering when you want cooking tallow efficiently. Choose wet rendering when purity matters above all else, particularly for tallow balm and dry-skin skincare formulations.
Sourcing Quality Beef Fat for Rendering
Your finished tallow can only be as good as the fat you start with.
Grass fed beef fat produces superior tallow in every measurable way. Animals raised on pasture develop fat richer in conjugated linoleic acid CLA, omega-3 fatty acids, and fat soluble vitamins. The resulting rendered beef fat carries a slight golden hue from beta-carotene—a sign of nutritional density, not a defect.
The highest quality fat for rendering comes from the leaf fat, or suet, surrounding the kidneys. This hard, crumbly fat renders into the purest tallow with minimal connective tissue and the cleanest flavor profile, ideal if you plan to use the resulting tallow for skin care in bulk batches. Back fat and other trimmings work perfectly well but may require more thorough straining.
Finding quality beef fat requires some legwork. Your local butcher shop remains the best starting point—many butchers set aside suet for customers who ask. Farmers markets connect you directly with ranchers who can describe exactly how their animals were raised. Some online suppliers ship frozen grass fed beef suet nationwide.
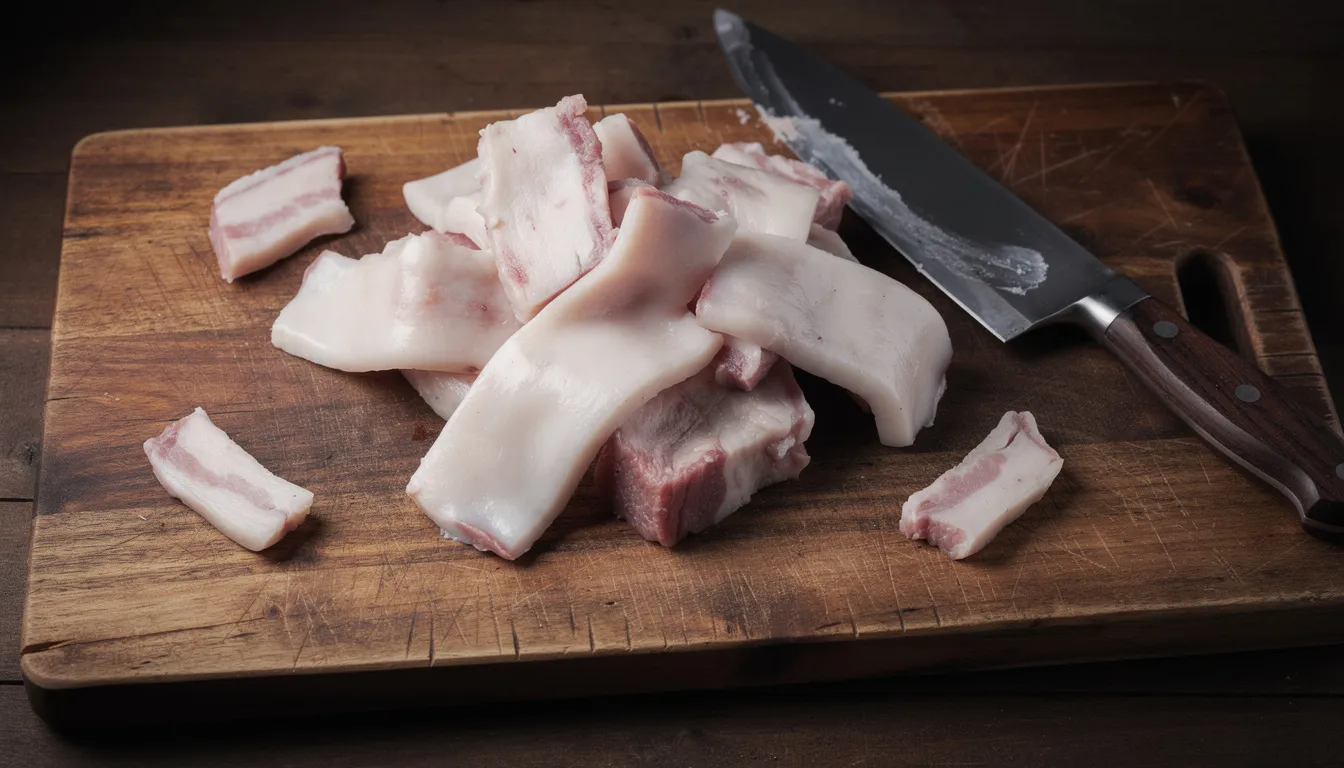
When speaking with butchers, request “beef kidney suet” specifically. Store raw fat in your freezer until rendering day; frozen fat actually cuts more easily than fresh.
Avoid fat with excessive meat attached, signs of freezer burn, or off odors. Quality raw fat should smell clean and neutral, appearing white to slightly cream-colored.
Essential Equipment and Preparation
You likely already own most of what you need.
Required tools:
Slow cooker or crock pot (6-quart handles substantial batches)
Sharp chef’s knife or butcher knife
Large cutting board
Fine mesh strainer
Heat-safe container for collecting liquid fat
Wooden spoon for stirring occasionally
Optional but helpful equipment:
Food processor (dramatically speeds fat preparation)
Cheesecloth or muslin for ultra-fine straining
Immersion blender (useful for breaking down large pieces)
Kitchen scale for measuring ratios
Thermometer for monitoring temperature
Preparing your fat: Cold fat cuts more easily than room temperature fat. Keep your beef suet chilled until ready to process. Trim away any visible meat, blood spots, or discolored areas. Then cut the fat into small, uniform pieces—roughly 1-inch cubes. Smaller pieces mean faster, more even rendering.
A food processor transforms chunks into finely ground fat in seconds, dramatically accelerating your rendering process. If grinding, work in batches and don’t overload the processor.
Set up your workspace near the stove or outlet for your slow cooker. Rendering takes hours; you’ll want everything accessible, whether you’re stocking your pantry or planning to make tallow-based cooking fats, soaps, or skincare products. Good ventilation helps manage the beefy smell that develops during processing.
Step-by-Step Dry Rendering Process
Dry rendering rewards patience. This straightforward method transforms your prepared beef fat into golden, cooking-ready tallow.
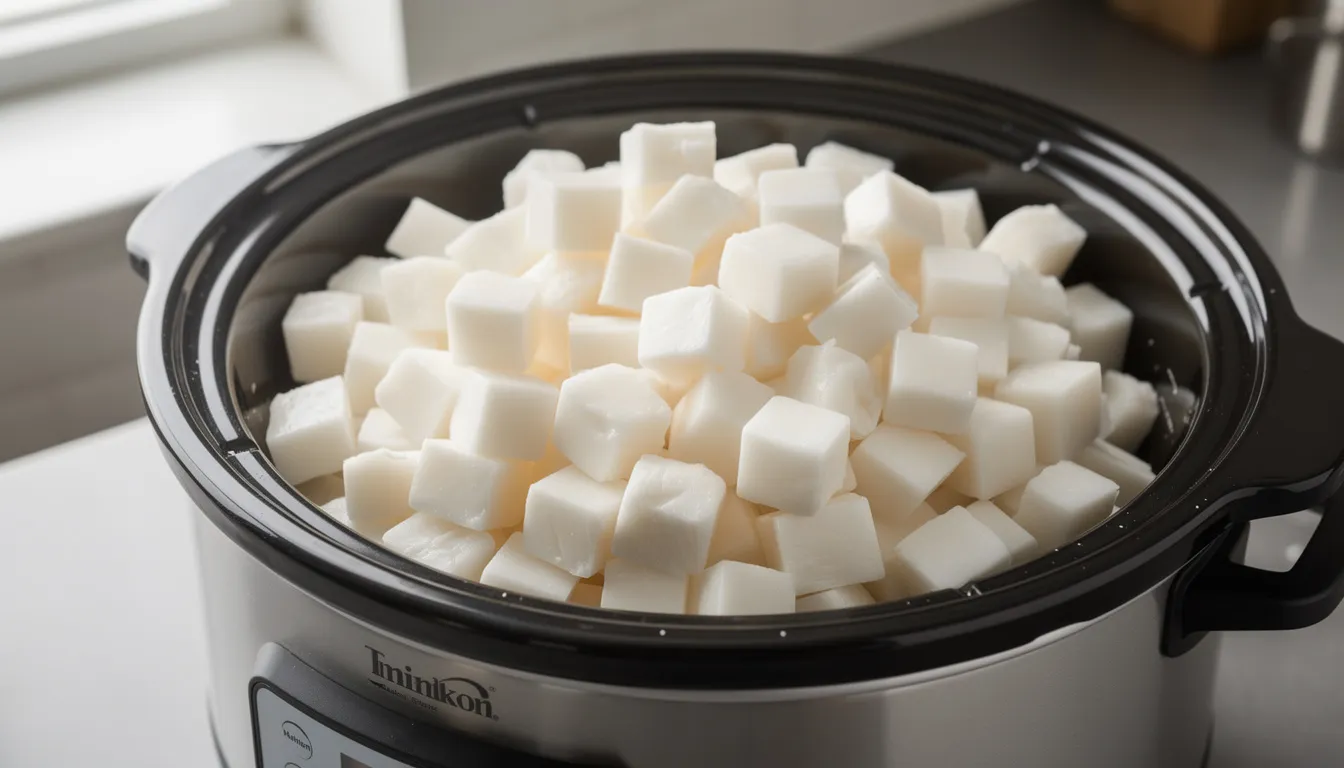
Starting your render: Fill your slow cooker with prepared fat pieces—a 6-quart pot holds roughly 5-6 pounds. Add 1/4 cup of water to the bottom initially; this prevents sticking during the first hour while the fat begins releasing its own liquid fat.
Set temperature to the lowest setting. True low heat prevents scorching and preserves the delicate fatty acids that make grass fed tallow so valuable.
During the render: For the first two hours, check and stir occasionally—every 30-45 minutes keeps everything rendering evenly. As melted fat accumulates, stirring becomes less critical, but continued monitoring prevents any pieces from settling and burning.
You’ll notice the liquid tallow increasing as solid fat decreases. The remaining solid pieces shrink and eventually become cracklings—crispy remnants of connective tissue and protein.
Recognizing completion: After 4-6 hours for smaller batches (up to 8+ hours for larger ones), visual cues tell you when to stop. The bubbling slows dramatically as water evaporates completely. Cracklings turn golden-brown and sink to the bottom, sometimes crackling audibly like popcorn. The liquid fat above becomes clear and golden.
Straining and finishing: Position your fine mesh strainer over a heat-safe container. Carefully ladle or pour the hot fat through, allowing cracklings to remain behind. For exceptionally clean results, line your strainer with cheesecloth.
Allow the melted tallow to cool undisturbed. As it solidifies, you’ll have beautiful rendered beef tallow ready for cooking and storage.
Step-by-Step Wet Rendering Process
The wet method demands more time but delivers remarkably pure tallow—virtually odorless and snow-white.
First purification cycle: Place prepared beef fat in your slow cooker. Add water in roughly equal volume to the fat. Include 1-2 tablespoons of salt per pound of fat; this helps bind impurities and neutralize any lingering beef smell.
Set to low and allow the mixture to heat gently. The water creates a protective layer while dissolving water-soluble impurities like proteins and minerals.
Separation and layering: As rendering progresses (4-6 hours), you’ll witness the magic of wet rendering: distinct layers form. Liquid tallow floats on top, followed by a middle layer of glycerin and jelly-like substances, then solids at the bottom containing meat residues and connective tissue.
Remove from heat and allow to cool completely—several hours or overnight. The hardened tallow lifts away from the aqueous layer below as a solid cake.
Scraping and cleaning: Flip your tallow cake and examine the bottom. You’ll find a layer of residue that separated during cooling. Scrape this away with a knife until you reach clean, white fat.
Additional purification cycles: For truly pure white tallow, repeat the process. Melt your scraped tallow cake with fresh water and salt, simmer gently for 1-2 hours, then cool and separate again. Each cycle removes more impurities.
Most wet rendered tallow achieves pristine results after 2-3 cycles. You’ll know you’ve reached completion when the separated liquid below remains virtually clear and the tallow cake shows consistent color throughout.
Purification and Finishing Techniques
Whether you’ve chosen wet or dry rendering, proper finishing elevates your tallow from good to exceptional.
Removing impurities: After initial rendering, examine your tallow for any remaining particles, cloudiness, or off-colors. A final strain through cheesecloth-lined fine mesh strainer catches what earlier passes missed.
For stubborn odors, a small amount of baking soda (1/4 teaspoon per pound) added to your final melt can help neutralize remaining beef smell. Allow the tallow to settle after adding baking soda, then carefully decant the purified tallow, leaving any residue behind.
Proper cooling: Cool your liquid tallow slowly at room temperature rather than refrigerating immediately. Rapid cooling can trap moisture and create an uneven texture. Once solidified, your tallow should appear smooth and uniform.
Scraping and cleaning: Any wet-rendered tallow cake needs bottom scraping. Even dry-rendered tallow may have a thin layer of residue where it contacted the container bottom. Take time to scrape until you see pure fat throughout.
Final melting and pouring: For storage, gently melt your cleaned tallow one final time. Pour into your chosen containers—mason jars work beautifully—and allow to cool undisturbed. This final step creates a smooth, professional appearance and ensures no hidden impurities remain.

Storage and Shelf Life
Properly rendered tallow rewards you with remarkable shelf stability.
At room temperature, pure tallow keeps for months—many report a year or longer without refrigeration in a cool, dark location. The key word is “properly rendered”: any residual moisture or impurities shorten shelf life dramatically.
Refrigeration extends storage indefinitely, while freezing preserves tallow for years. Divide large batches into portion sizes you’ll use within a few months if storing at room temperature.
Container selection matters. Glass mason jars allow you to monitor condition while preventing oxygen exposure. Ensure containers are completely dry before filling; even small water droplets invite bacterial growth.
Store away from light and heat sources. A pantry or cabinet works well; countertop storage near windows or stoves exposes tallow to degrading conditions.
Signs of spoilage include off odors (rancid, sour, or “painty” smells), color changes to yellow or gray, or unusual texture. Quality tallow smells neutral or mildly fatty. When in doubt, discard and render fresh.
Tallow Rendering FAQ
Why is my tallow yellow or smelly?
Yellow color typically indicates one of three causes: grass fed beef tallow naturally carries a golden tint from beta-carotene (this is desirable and indicates nutrient density), the fat was exposed to excessive heat during rendering, or impurities remain in the finished product.
A persistent beefy smell usually means incomplete rendering or insufficient purification. Try the wet method with multiple cycles. Adding essential oils to finished tallow for skincare applications can also mask mild residual scents.
Truly problematic odors—rancid, sour, or chemical smells—indicate degraded fat that should be discarded.
How long does the rendering process take?
Dry rendering runs 4-6 hours for smaller batches (2-3 pounds) in a slow cooker, extending to 8+ hours for larger quantities. Ground fat renders faster than cubed.
Wet rendering adds significant time. The initial cook takes 4-6 hours, followed by cooling (several hours to overnight), scraping, and additional purification cycles. Plan for 1-2 days total for wet rendered tallow with multiple purifications.
Can I render other animal fats using these methods?
Absolutely. These methods adapt readily to other animal fat types.
Lamb fat renders almost identically to beef, producing a slightly softer tallow with a distinct (but pleasant) flavor profile.
Pig fat uses the same techniques to produce lard—rendered pork fat that remains softer at room temperature. Some call this process rendering lard rather than making tallow.
Duck fat renders beautifully at even lower temperatures due to its higher proportion of unsaturated fats.
What should I do with the leftover cracklings?
Those crispy remnants of rendered fat make surprisingly delicious additions to various dishes. Season with salt and enjoy as a savory snack. Crumble over salads for added crunch and richness. Incorporate into cornbread or biscuit recipes.
Store cracklings refrigerated and use within a few days, as they contain protein that spoils faster than pure fat. Some also add them to bone broth for additional richness.
Popular Uses for Rendered Tallow
Your finished tallow opens doors to countless applications.
Cooking applications: Beef tallow’s high smoke point (around 400°F) makes it exceptional for frying, producing remarkably crispy fried foods without the breakdown and off-flavors of common seed oils. Roasted vegetables develop beautiful caramelization. Pastry made with tallow achieves flaky perfection reminiscent of traditional pie crusts.
Saturated fats like tallow remain stable at high cooking temperatures, unlike polyunsaturated vegetable oils that oxidize and degrade.
Skincare uses: Pure beef tallow’s fatty acid profile closely mirrors human skin’s natural sebum, making it extraordinarily effective for moisturizing. Tallow balm made with grass fed tallow and essential oils creates luxurious body butter. Adding essential oils like lavender or frankincense transforms basic tallow into sophisticated skincare.
The health benefits extend beyond moisturizing: vitamins A, D, E, and K support skin health, while conjugated linoleic acid offers potential anti-inflammatory properties.
Household applications: Traditional uses remain relevant today, and the complete guide to tallow spans everything from skincare and cooking to candle making. Tallow makes exceptional soap—hardworking bars that last. Candle makers prize tallow for its clean burn. Leather conditioning with tallow softens and preserves goods naturally.
Troubleshooting Common Rendering Problems
Even experienced renderers encounter challenges. Here’s how to address common issues.
Burned or overheated tallow: If your tallow developed a dark color or off-taste from scorching, you cannot reverse the damage—but you can prevent recurrence. Use genuine low heat settings. Add small amounts of water initially to prevent sticking. Stir regularly during the first hours.
Slightly overcooked tallow may still work for soap making or outdoor applications where taste doesn’t matter.
Tallow that won’t solidify properly: Soft fat that remains semi-liquid at room temperature usually indicates either residual moisture or contamination with softer fats. Check that all water has evaporated (no bubbling when melted). Ensure your fat source was pure beef or lamb, not mixed with pig fat.
Some softness is normal in warm environments. Refrigerate to achieve solid fat, then return to room temperature storage.
Persistent odors or off-flavors: A lingering beef smell often responds to additional wet rendering cycles with salt. Thorough scraping of tallow cake bottoms removes odor-carrying impurities. Ensure complete rendering—incompletely rendered fat carries stronger odors.
For culinary use, the slight beefy smell becomes undetectable during cooking. For skincare, wet rendered tallow with essential oils solves most odor concerns, especially when crafted into nourishing body butters and moisturizers.
Preventing contamination: Use clean, dry equipment throughout. Wash everything with hot soapy water before and after. Ensure containers are completely dry before filling. Keep rendered tallow covered during storage.
Next Steps in Your Tallow Journey
You’ve learned the fundamentals. Now comes the rewarding part: practice and exploration.
Start with small batches to build confidence before scaling up. A few pounds of beef suet teaches you everything without overwhelming commitment. As your skills develop, tackle larger renders—some home renderers process 50 pounds at a time.
Experiment with both methods. Try dry rendering for your cooking tallow, wet rendering for skincare applications. Compare the results and develop preferences for your specific uses.
Connect with others walking this path. Traditional foods communities thrive online and locally, sharing tips, troubleshooting problems, and celebrating successes, especially as more people rediscover tallow as a sustainable, nutrient-rich cooking fat. Homesteading forums offer decades of accumulated wisdom about rendering beef tallow and countless other traditional skills.
Share what you create. Homemade tallow makes a remarkable gift—jars of cooking fat for food-loving friends, tallow balm for those seeking natural skincare alternatives. Your rendered beef tallow today might inspire someone else’s journey tomorrow.
Thank you so much for learning this traditional skill. Every batch you render connects you to generations of practical wisdom, transforms what might be waste into something valuable, and gives you products more pure and nourishing than anything you could buy. That’s worth celebrating.


